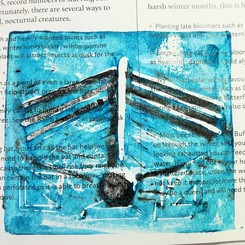
 Those of you who have been following the blog for a while know that I like trying out new things. I was booked on a lino cutting workshop recently, which was unfortunately postponed at the last minute (due to adverse weather conditions). Undeterred, I took myself off out to the studio and dug out the starter lino cutting kit which I bought last autumn. I read the instructions ( a first for me!) and even watched couple of Youtube videos (again, not something I do that often - this one with James Green in Sheffield especially appealed to me). And then I just had a go. To start with, I made some different marks in the lino, using the cutting tools; some thin and some thick. This was on a very small piece of soft lino, about 5cm x 10cm. 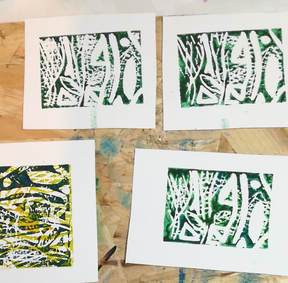 I was quite happy with the results. I wasn't aiming for a particular pattern or shapes. I used one colour, then turned the lino round and added another layer using a different colour. It was fun to just play! I then moved on to creating a picture. As is often the case, I didn't quite have the right tools for the job. I didn't have tracing paper, so made do with greaseproof paper from the kitchen drawer instead. Shame it was the brown stuff, as it made it hard to see through. I only had black printing ink (it came in the kit); I wanted to try out other colours, so had a go with some gouache (applied to the lino with a brush, so brush marks appeared in the print - might be a good effect, if that's what you're after). I also tried acrylic paint, applied with a roller (or brayer), which was the right sort of consistency, but too sticky for the paper I was using - the top layer of paper came away and stuck to the lino.
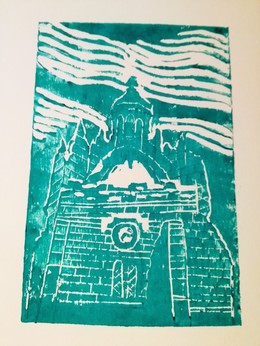
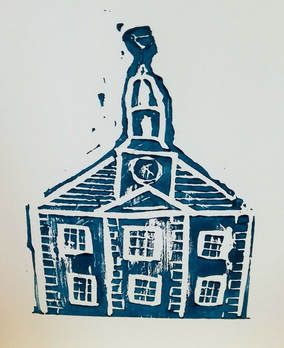
I carried on experimenting. Test prints were done on old magazine pages (see the first image) and subsequent ones on good quality printing paper with poor quality monoprints on the back (my own ones from a screenprinting workshop I attended a while ago). The plan is to do a series of prints of Aberdeen buildings - so far the Old Town House and King's College have made it into print. It's certainly a work in progress - quite a bit of refining is needed - I'll keep you posted!
0 Comments
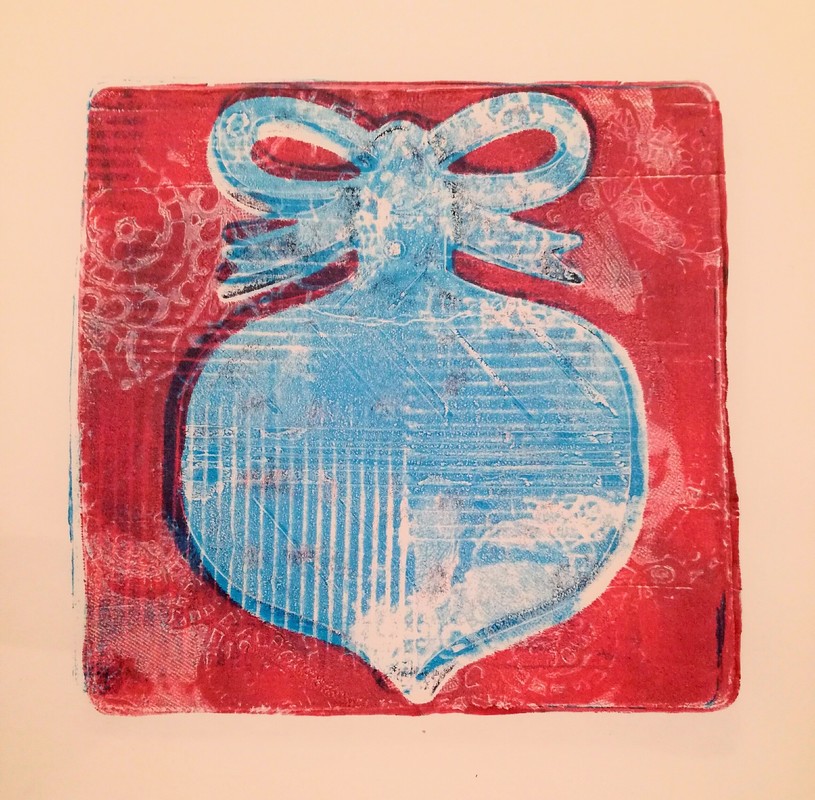
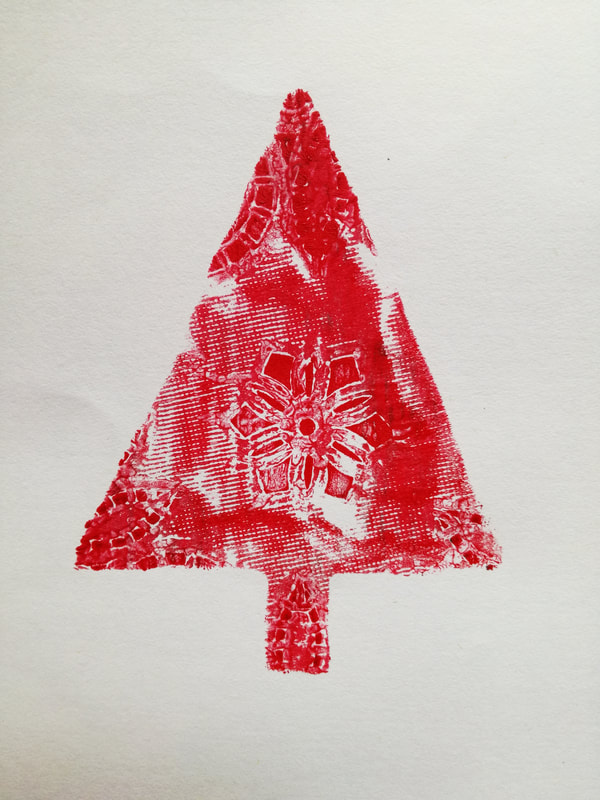
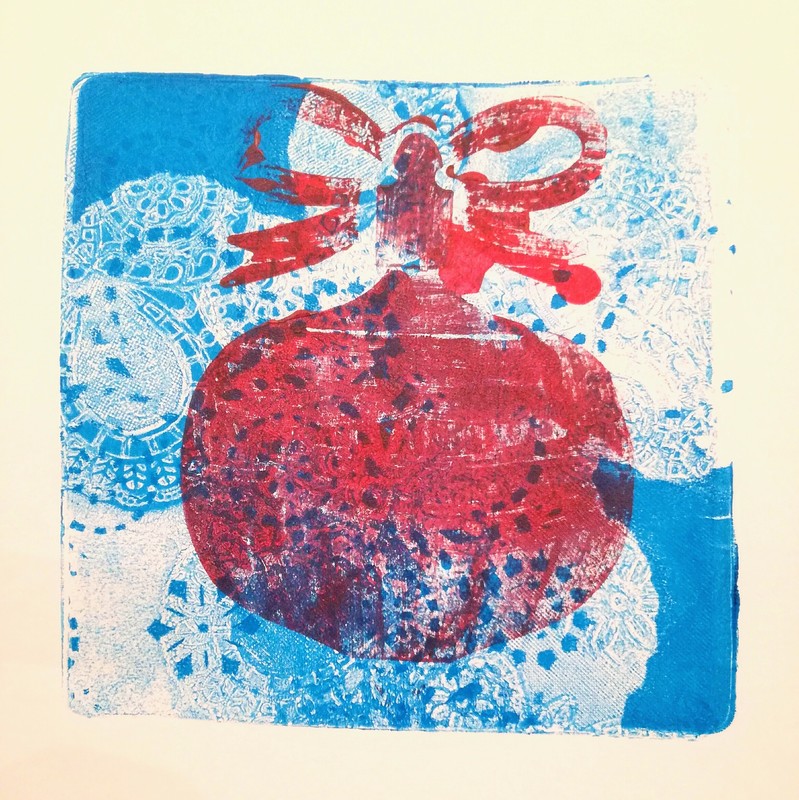
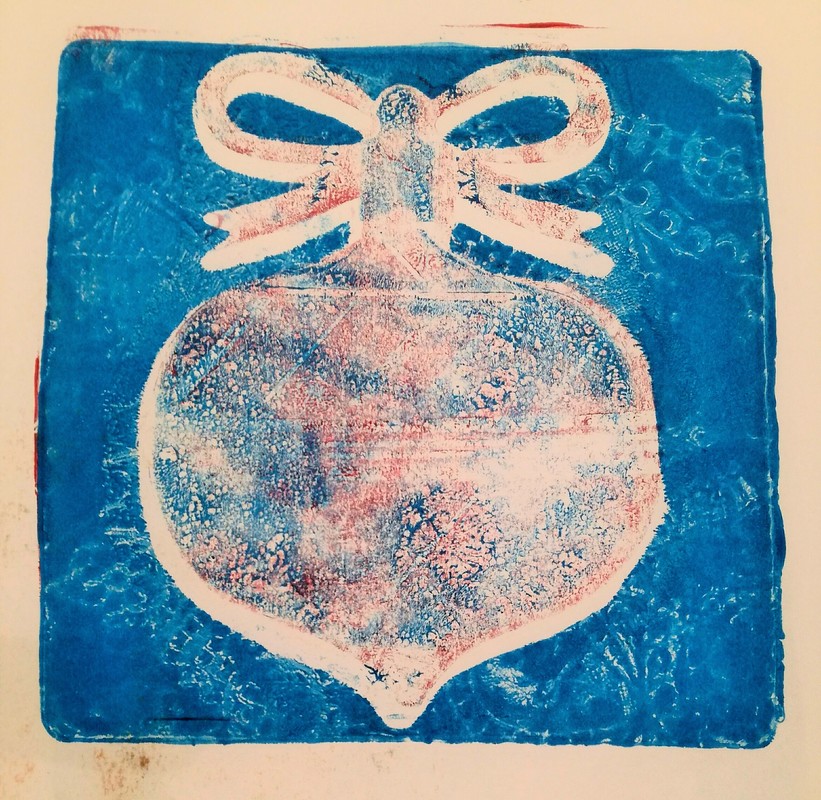
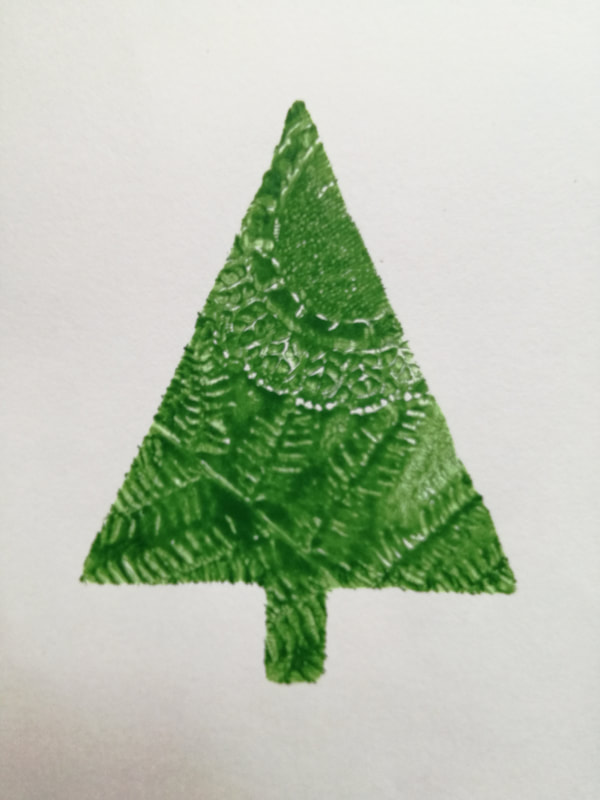
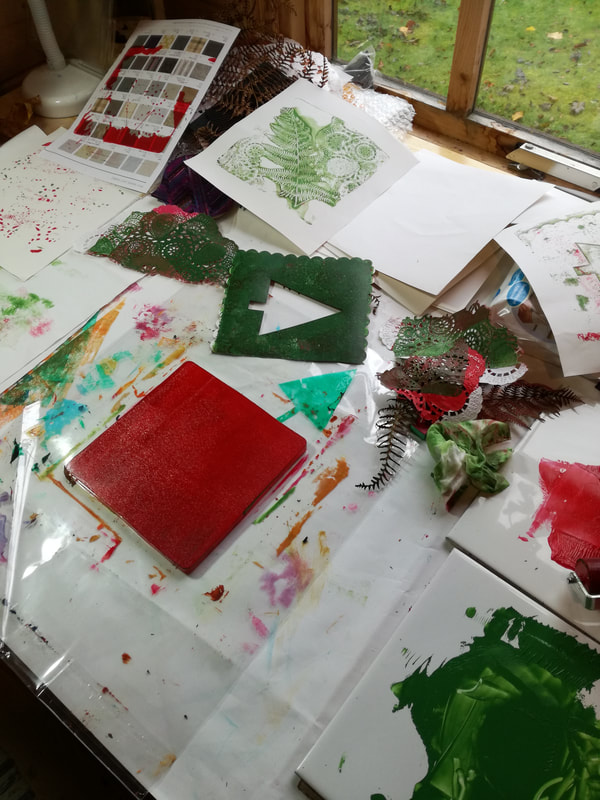
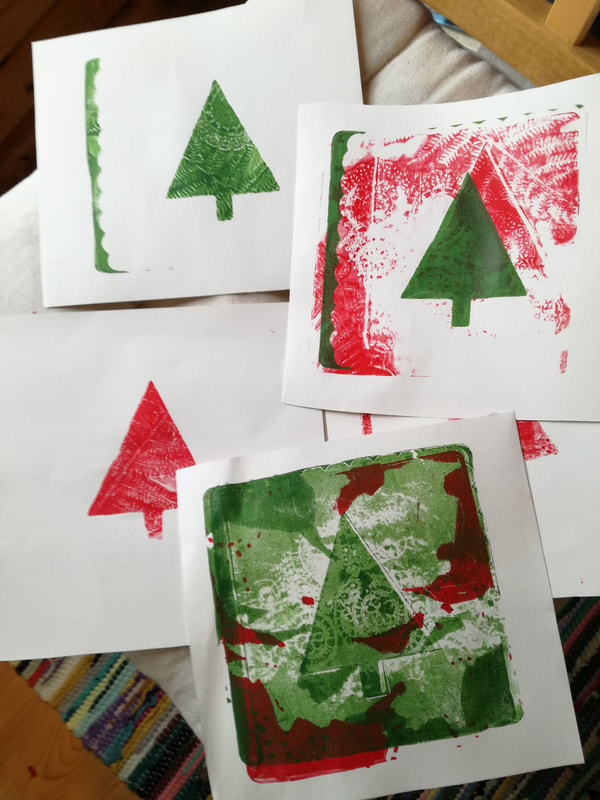
Many thanks to everyone who came to visit us at Newton Dee during North East Open Studios in September. It was lovely to meet all who visited and I really enjoyed the company of my fellow artists. One of these artists was Lucy Brydon, who was showing visitors the delights of gelli printing. Last year I had a go at this and recently I acquired some gelli printing equipment (basically just a small gelli plate and a roller for rolling out paint or ink onto it. I already had acrylic paint in the studio). Over recent days I've been having a go at printing some designs for this year's Christmas cards. It has been an interesting experience; I am learning as I go along. I am finding it harder than I expected to figure out what order to do the different steps in. Doing things in reverse does not seem to come naturally to me. It's fun, though, laying down layers of different colours, using stencils and found objects (leaves, ferns, fabric, wool, paper doilies) to make patterns. the whole process will be easier once I have another roller or two for inking up the gelli plate! (they have been ordered, hope they come soon!). I am realising it would almost certainly be better and easier to using printing inks for this method, as the acrylic paint I am using dries very quickly. This can also be seen as an advantage, not having to wait for prints to dry before adding another layer. Using up materials I already have, however, is what needs to be done for now, so I will persevere with the acrylic paint. The next step is to take photographs of the prints, maybe tweak the colours a little, or crop the images, and decide which ones to use for my cards this year! Onwards and upwards.
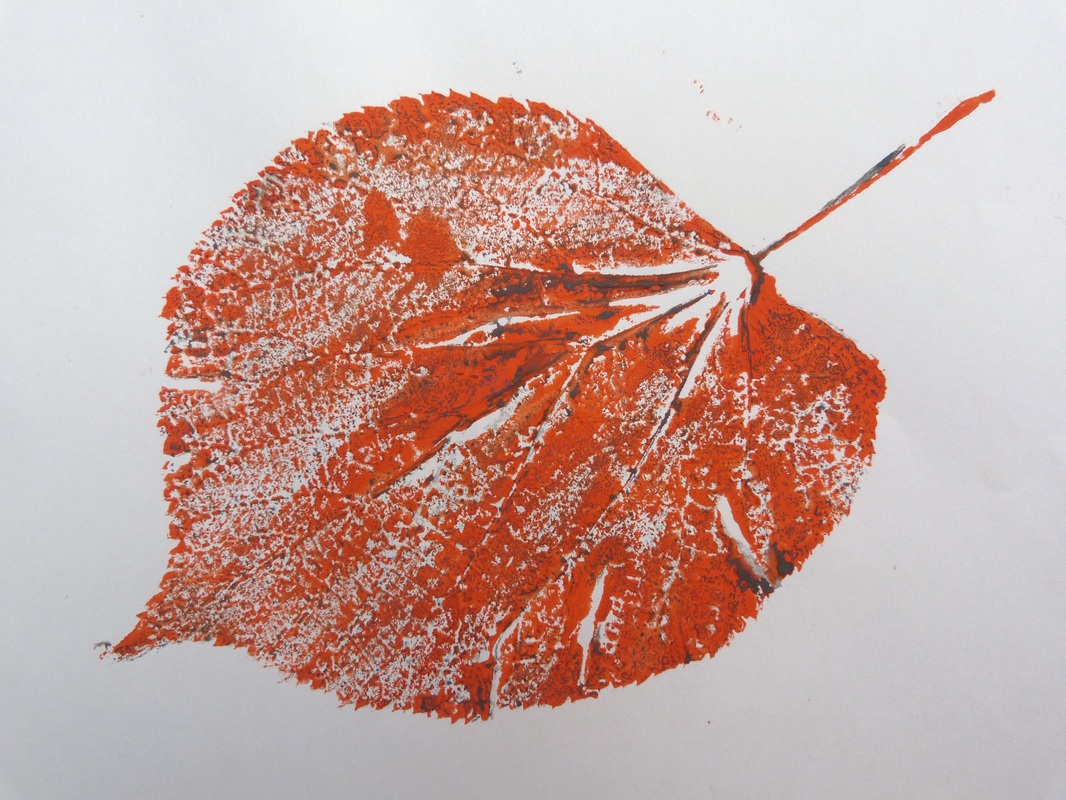
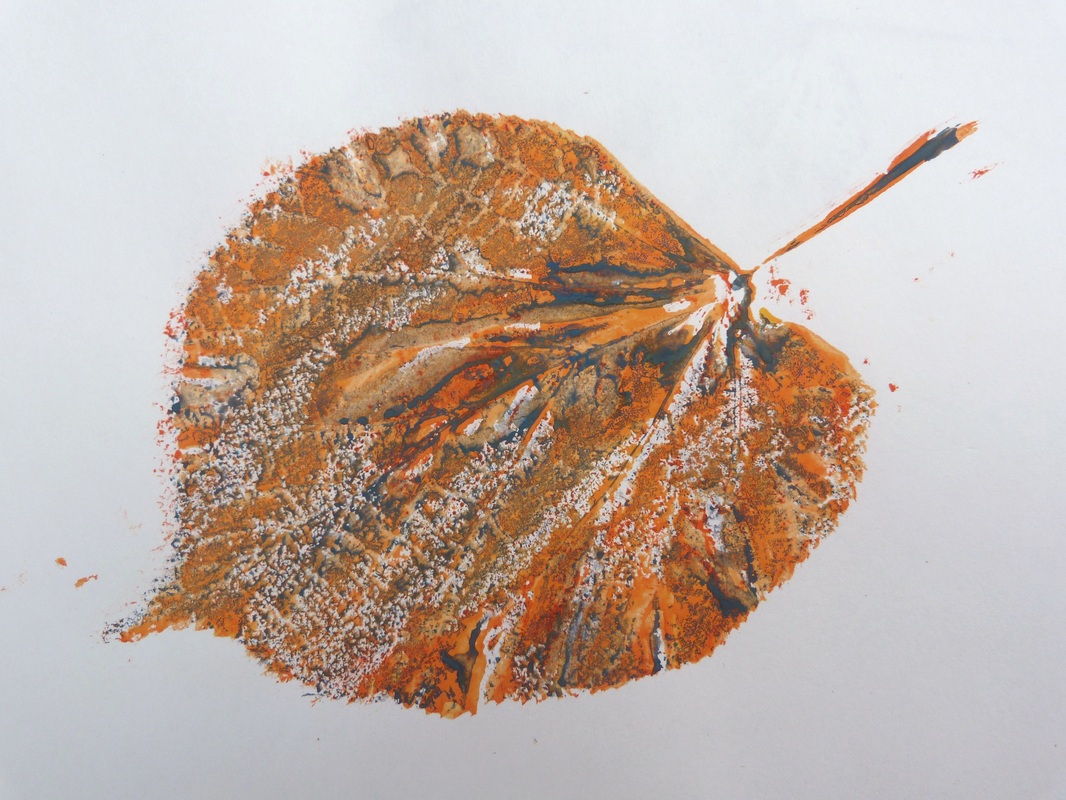
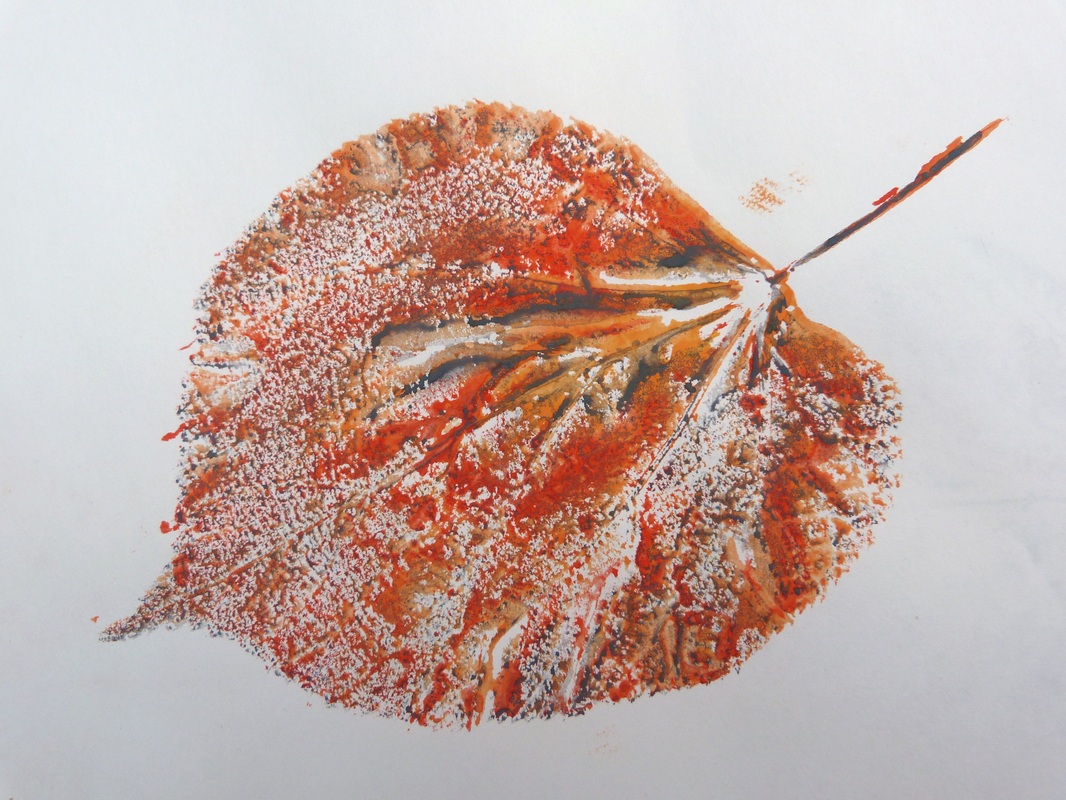
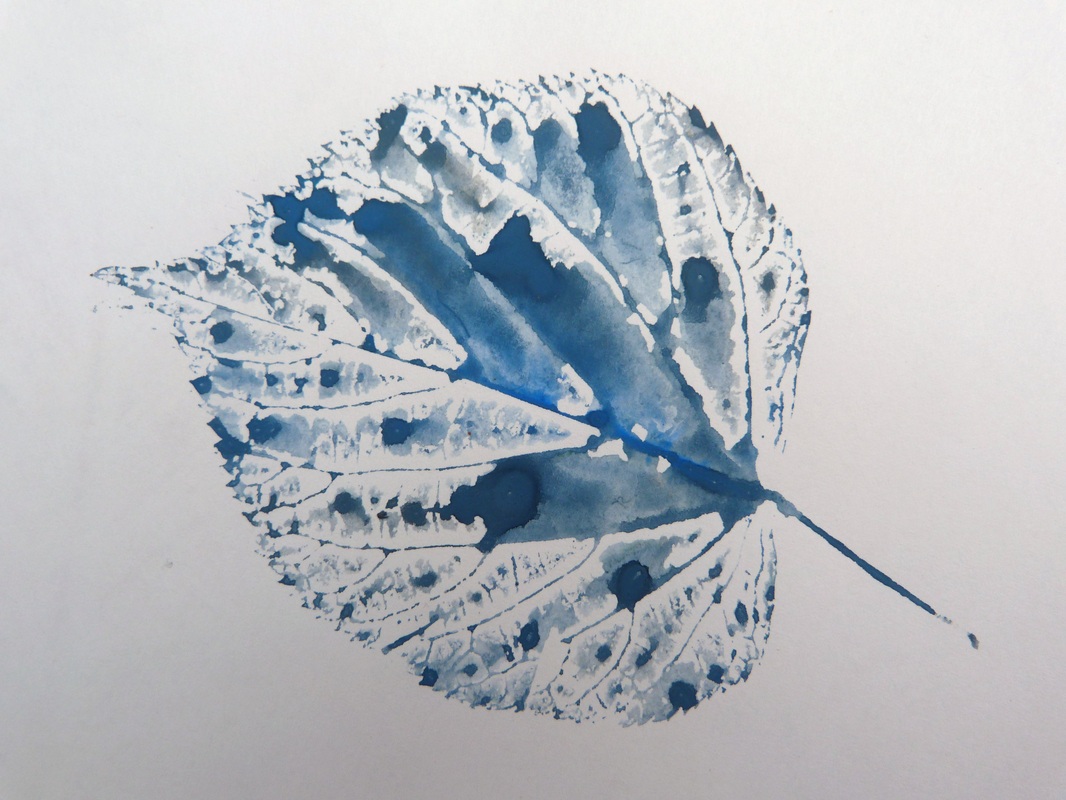
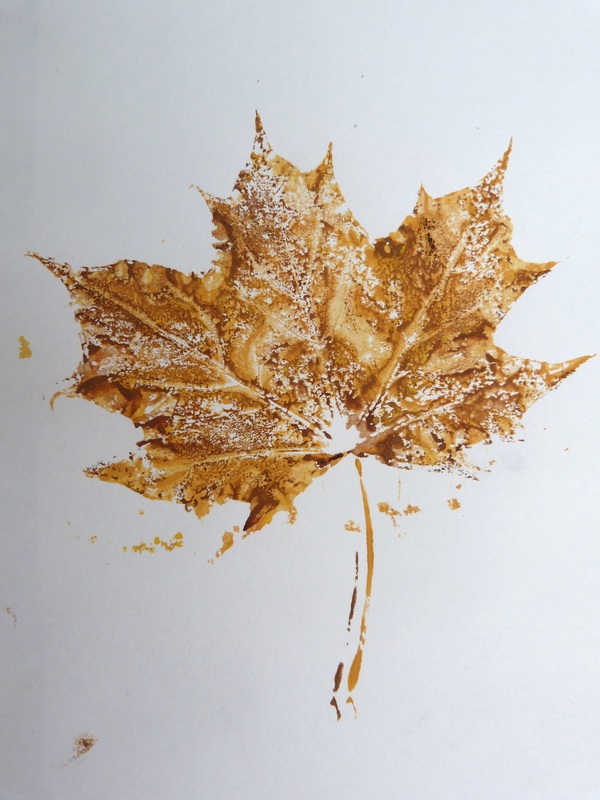
I have been collecting autumn leaves. Quite a few different kinds. Lime, sycamore, chestnut, beech, oak and gean (wild cherry). The colours at the moment are beautiful - gold, bronze, red, yellow, orange and mixtures of all these together, often all in one leaf. I was supposed to be at a printing workshop last weekend - it was postponed, but I still wanted to experiment with some printing ideas of my own. So I tried some different ways of printing, using the leaves I had collected. Watercolour paint proved to be a bit thin (at least the pan type, which I normally use for painting). Instead I tried gouache, which I have used very little for painting. The consistency proved to be much better for making impressions. I experimented with paper textures - smooth paper worked better than rough. The upper side of the leaves seemed to work better than the underside. Fresh leaves worked better than dried ones. It is all subjective, I suppose. It depends what kind of end result you are aiming for. It was fascinating to see the range of effects that could be achieved using such a simple method. Multiple layers of colours gave particularly interesting results. To be continued.
|
Archives
February 2024
Categories
All
|


 RSS Feed